How to resend an Outlook email – Outlooks Hidden Feature

Posted on

Do you need to send an email again? Maybe you forgot to attach a file the first time, or maybe you sent it to the wrong person, maybe you need to add a few more recipients…

One way to do this is to go to find the sent email (in your Sent Items folder) and then do a Forward or Reply on it, make any changes you want and then click Send. The problem with that is it adds FW or RE in the subject line… and adds the original send dates, recipients etc in the body of the email. Any changes that you make to the email may also be highlighted in a different color making it look like you resent the email.

If email security and confidentiality is important to your organization, you may also want to look at SendGuard for Outlook.

There is an another way built into Outlook.

Go to your Sent Items folder.

Open the email in its own window (by double-clicking on it).

The Message tab of the Ribbon should already be selected (click on it if you need to).

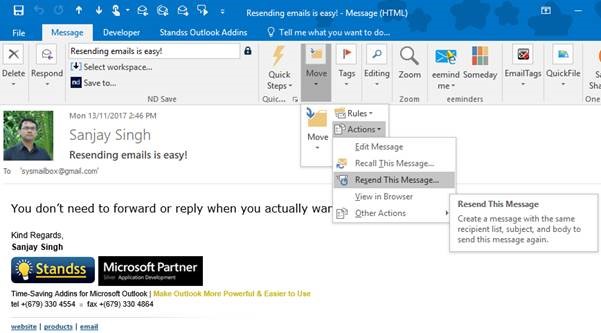
One the Move group, click Actions and then click Resend This Message.
SendGuard for Outlook
A new unsent email will be opened will all the details of this email copied to it. Make any changes that you need to and then click Send.


Resetting Microsoft Edge Browser

Posted on

Resetting Microsoft Edge Browser

Sometimes Microsoft’s Edge browser simple does not work properly. Web sites fail to load, web apps do not work properly and in general Edge3 causes more trouble than its worth. That’s when Firefox & Google Chrome can be saviors.

If you are experiencing any or other issues with Edge, than you can try this fix.

WARNING – resetting a browser may result in data loss, including the loss of favorites, settings, browser history, installed extensions, or other things maintained in the browser

To Reset Microsoft Edge:

  1. Turn “off” Device Sync Settings (Settings > Accounts > Sync your Settings > Sync Settings).
  2. Open File Explorer
  3. Find the following: C:\Users\%username%\AppData\Local\Packages
  4. Select and delete the following folder:
    Microsoft.MicrosoftEdge_8wekyb3d8bbwe(Select “Yes” on any confirmation dialog that follows.)
  5. In %localappdata%\Microsoft\Windows\SettingSync\metastore, delete
    meta.edb, if it exists.
  6. In %localappdata%\Microsoft\Windows\SettingSync\remotemetastore\v1, delete
    meta.edb, if it exists.
  7. Restart your PC (Start > Power > Restart).
  8. Turn “on” Device Sync Settings (Settings > Accounts > Sync your Settings > Sync Settings).
  9. Search for “PowerShell” using Cortana.
  10. Right-click the “Windows PowerShell” result, then select
  11. Run as administrator.
  12. Copy the following command, then Paste it in the PowerShell window and press Enter to run it:

Get-AppXPackage -AllUsers -Name Microsoft.MicrosoftEdge | Foreach {Add-AppxPackage -DisableDevelopmentMode -Register “$($_.InstallLocation)\AppXManifest.xml” -Verbose}

13. Then the command completes, Restart your PC (Start > Power > Restart).

Create web page shortcut for Edge

Posted on

To create a desktop shortcut in Microsoft Edge to open a website or a web page direct in Edge browser, you will have to follow the usual way to create a desktop shortcut and change its icon.

If you have set Edge as you default browser:

  • Right-click on the desktop
  • New
  • Shortcut
  • In the Type the location of the item field, type the URL of the web page
  • Click on Next, give the shortcut and name and complete the process. You may want to change the icon of the newly created shortcut.
  • Now when you click on it, the web page will open in Edge.

Turn off Low Toner Notifications in Windows 10

Posted on

How to turn off “Low Toner Notifications” in windows 10

Go to Devices and Printers
Click on Print Server Properties (in the “toolbar” area above the list of devices).
Click on the Advanced Tab.
For a local printer: Uncheck “Show Informational notifications for local printers”.
For a network printer: Uncheck “Show Informational notifications for network printers”.
Click OK.

Windows 10 Fall Creators Update Begins Deployment

Posted on

Beginning on October 17th, 2017 at 10 a.m. P.T., the Windows 10 Fall Creators Update will begin rolling out to Windows 10 PCs across the world.

You don’t have to do anything to get the update; it will roll out automatically to you through Windows Update if you’ve chosen to have updates installed automatically on your device. Once the download is complete and the update is ready to install, you will be prompted to begin the installation. the update takes roughly 45 minutes or more to complete depending on your computer’s speed.

If you don’t want to wait for the update to roll out to you, you can manually check for updates on your computer using the steps below. This will only work if your device is eligible to get the Fall Creators Update. Alternatively, you can manually get the update today via the Software Download Site. This option is only recommended for advanced users on devices running a licensed version of Windows 10. If you’re using a Windows 10 PC at work, you will need to check with us for details on your organization’s specific plans to update.

[su_button url=”http://www.bulldogtechinc.com/our-story/contact-us/” target=”blank” background=”#bf1e2e” color=”#ffffff” size=”10″ wide=”yes” center=”yes” icon=”icon: arrow-down” icon_color=”#ffffff”]Contact Us[/su_button]

Ways to get the Windows 10 Fall Creators Update

1. To manually find out if your device is part of the first phase rollout, check for updates on the Windows Update settings page.

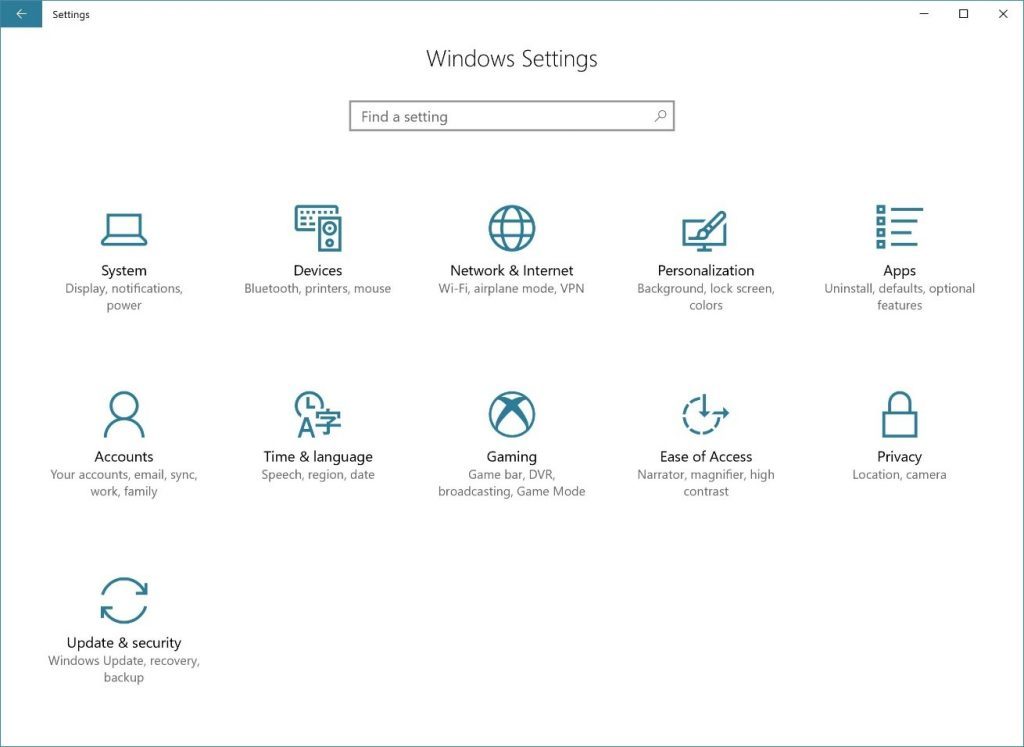
In the Search tab, type “Settings”. On the Settings page, navigate to Update & security > Windows Update
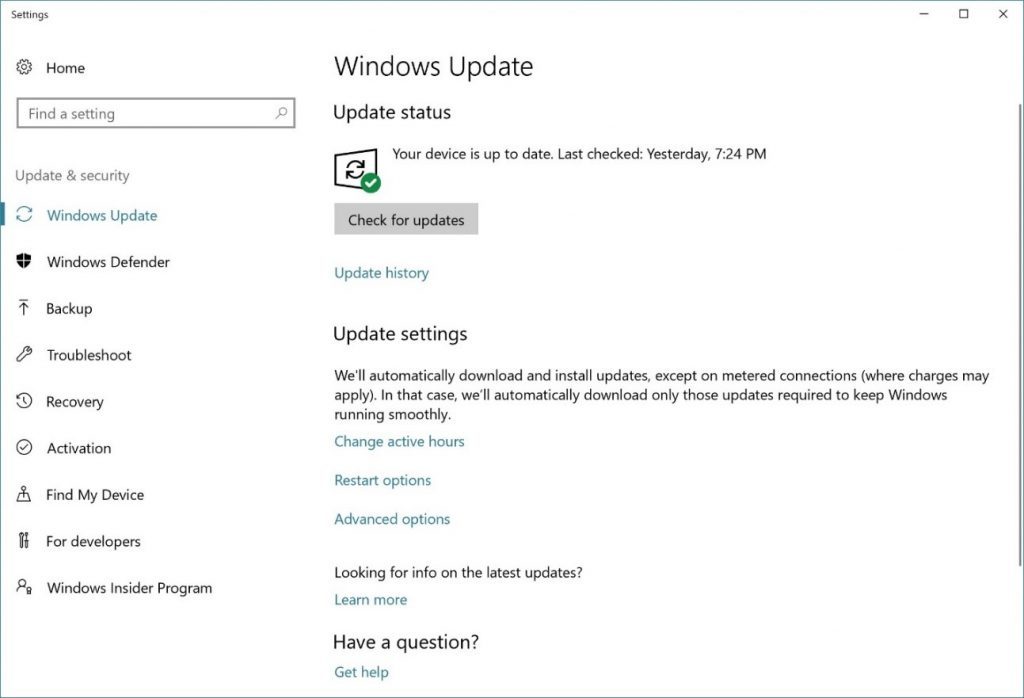
On the Windows Update page, simply click Check for updates. This will also check if your device is up to date with the latest monthly security updates.
If your device is part of the first phase of roll out, the feature update may begin downloading immediately to your PC. You can still use your PC as you normally would while the update downloads in the background.

Once the download is complete you’ll be prompted to select the best time to complete installation so as not to disrupt what you are doing.

If the update doesn’t begin downloading after you click “Check for Updates” on the Windows Update page, you’ll see a message stating “Your device is up to date.” This means your device has all the updates available for it based on your device’s eligibility at this time. At this point we recommend waiting until the Fall Creators Update is rolled out to your device automatically.

2. Manually update for advanced users

As an advanced user, you have two manual installation options. The recommended method is to utilize the Update Assistant. To do so, click the Update Now button on the Software Download Site. You’ll need a licensed version of Windows 10 to use this method to get the feature update. Alternatively, you can download and run the Media Creation Tool on the same site, which will help you perform a clean installation or reinstall of Windows 10.
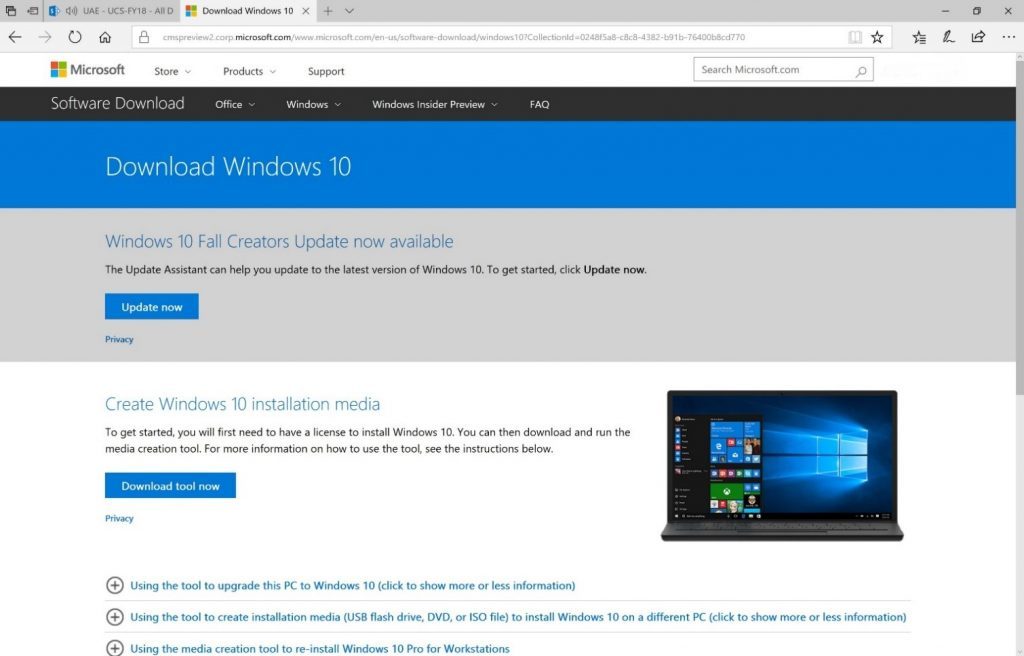
We hope you enjoy the Windows 10 Fall Creators Update and the many new features it brings. Click here to learn about all the new features in the Windows 10 Fall Creators Update. If you have feedback about your experience, please use the Feedback Hub app to share it with us. We’ll share more on how we roll out the Fall Creators Update shortly!

Potential Issues

So far, we noticed the following issues occuring after an upgrade. We will update this list as more are discovered:

  1. Dual Monitors: if you have dual monitors, you may need to disable the secondary one. When loading the video drivers, the install may lock up and need to be restarted.
  2. Password Protected Sharing: If before the update you had this feature turned off, it will get turned back on after the update. This may cause issues accessing network shares. To resolve, simply turn it back off.