Adding An Exchange Email Account on Android Devices

Posted on

Note: On Newer phones such as the Samsung Galaxy S22, use the OUTLOOK Phone APP

Steps for adding an Exchange Email on Android 8.0 (or higher):

You Will Need:

  • Your Email Address
  • Your Password
  • Server Addresss: VCSOWA.VCSNY.com
  • Domain: vcsny.com

If you are unsure of your account info, always give us a call so we can assist.

Steps
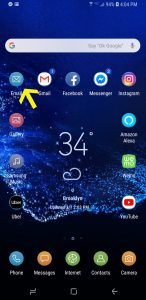
1. From the Home screen, tap the Email app
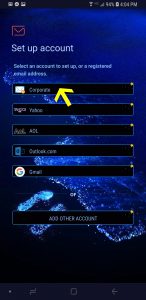
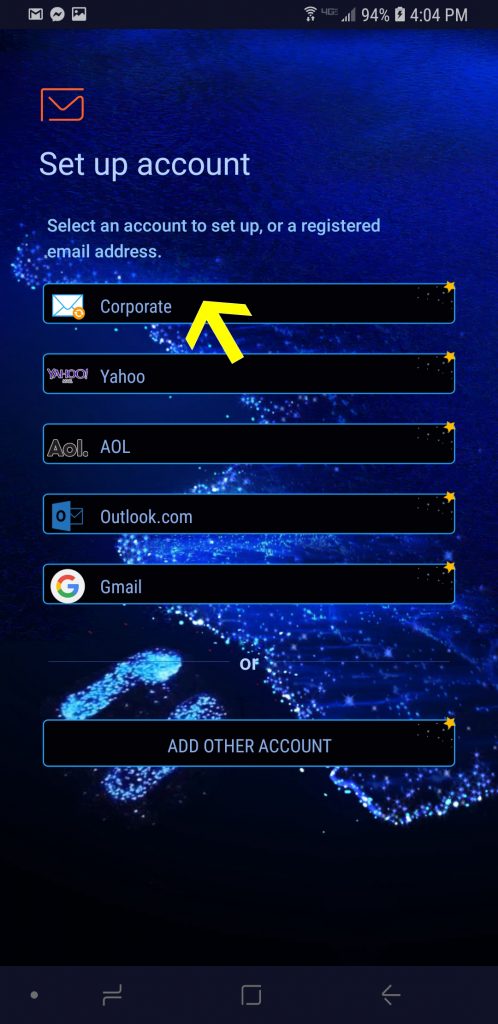
2. Select Corporate and tap Next
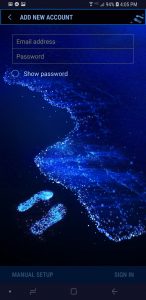
3. Enter your email address in the first box, then touch the Password box and enter your password. Touch Next
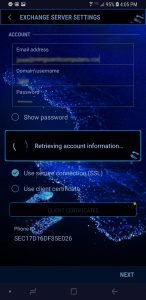
4. Your account information will automatically download from our exchange server.
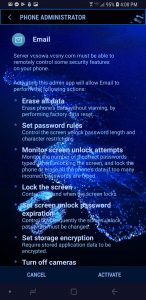
5. Once your information is retrieved you need to give the exchange server authority to manage your phone. Click activate to finish the setup. Your mail should begin downloading shortly.

Manual Setup:

  1. From the Home screen, tap the Email app
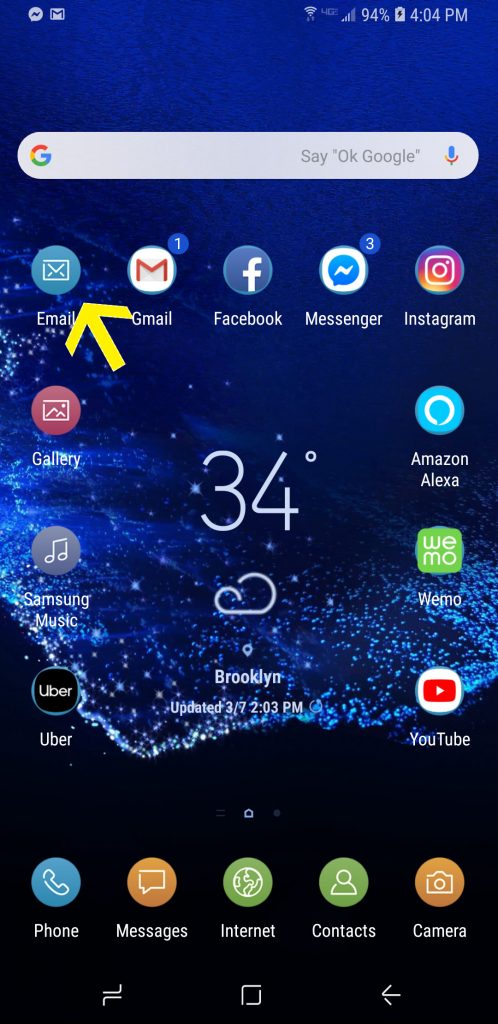
2. Select Corporate and tap Next
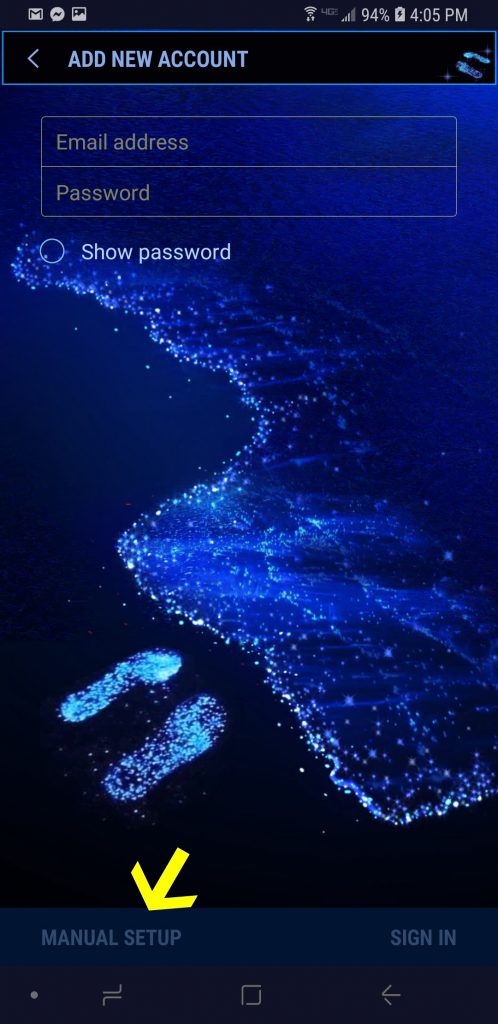
3. Enter your full email address and your password, and then select Manual Setup
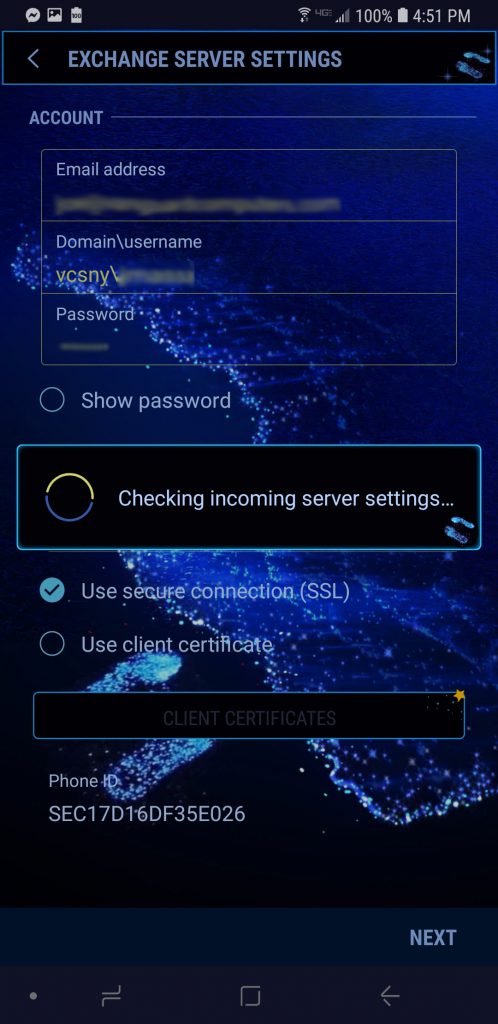
4. Enter your Email Address followed by your username in the following format: VCSNY\Username and then your password.  Next, enter the exchange server address: VCSOWA.VCSNY.COM and tap next.

5. Your account will then authenticate with our Exchange Server.
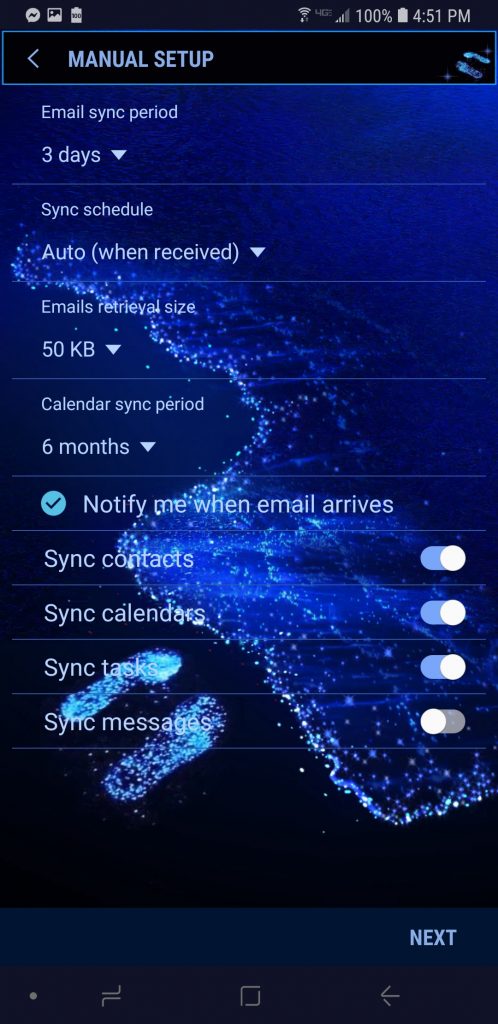
6. The Account options screen allows you to select the following ActiveSync options. In most cases the defaults can be left as is:
Email Sync Period – 3 Days is the default and is recomended
Sync Schedule: Auto – Mail will sync as soon as a new message is recevied.
Email retrieval size: 50kb is the default size. MEssages larger than this size will only download the headers. When you open the message you will be able to download the entire message.
Period to Sync Calendar: Default is 6 Months and can be increased if neccessary.
Notify me when email arrives: Default is Enabled (checked). Mark this option to have your device notify you that you have new email messages.
Sync contacts: Default is Enabled. Mark this option to synchronize your contacts to your device.
Sync calendar: Default is Enabled. Mark this option to synchronize your calendar to your device.
Sync tasks: Default is Enabled. Mark this option to synchronize your to do list to your device.
Sync Messages: This option should be disabled, it will sync SMS messages with the exchange server.
Tap Next
7. Enter a name for the account. This will help you easily identify this account if you add additional email accounts to your device. Then touch Don
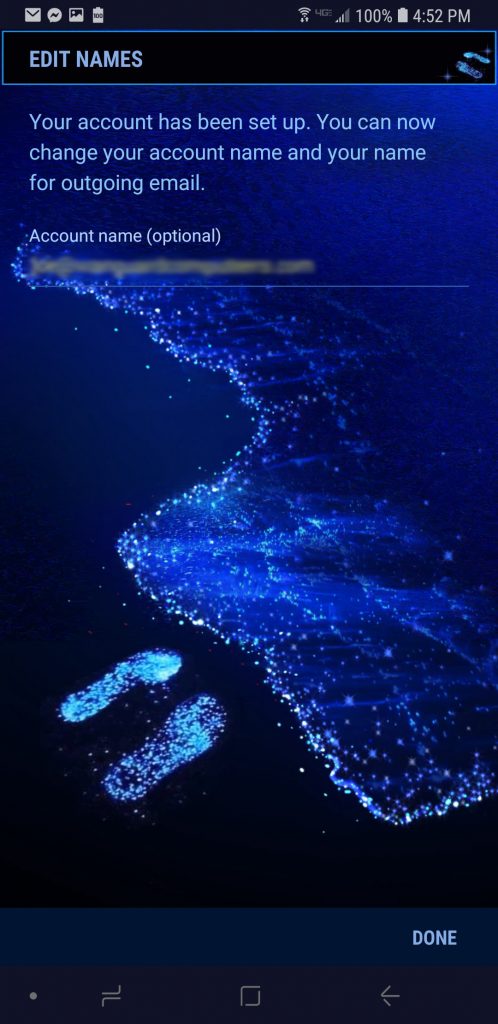
8. Tap Done

If you have any questions or experience any difficulty setting up your phone, please let us know.

For an in depth walk-through of the steps listed below, visit our website: http://www.bulldogtechinc.com/business-services/exchange-email-archiving/

Adding An Exchange Email Account On Apple Devices

Posted on

Steps for adding an Exchange Email on Apple Devices:

You Will Need:

  • Your Email Address
  • Your Password
  • Server Addresss: VCSOWA.VCSNY.COM
  • Domain: vcsny.com

If you are unsure of your account info, always give us a call so we can assist.

Steps

Follow these steps to setup your Exchange ActiveSync account your iOS device:

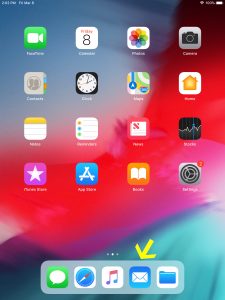
1. Tap the Email App from the home screen.

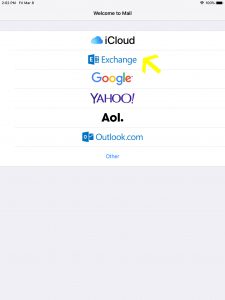
2. Go to Settings > Mail > Accounts > Add Account > Select Microsoft Exchange:

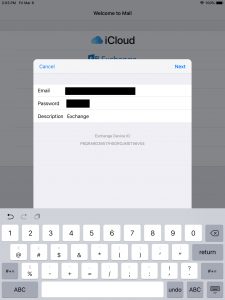
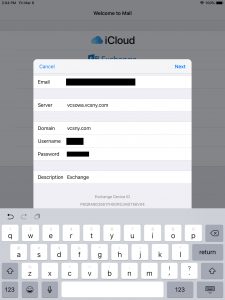
3. Enter your full email address and your password and tap next.

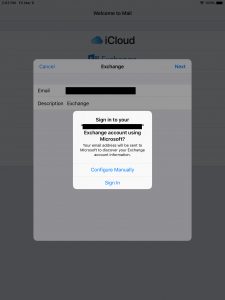
4. Tap Sign In

.

5. Enter the Server Address: VCSOWA.VCSNY.COM and verify your username and password are correct. Tap Next

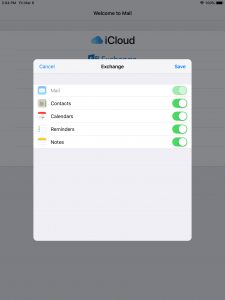
6. Check off each item to sync and then tap finished. Your email should begin downloading shortly.

Note: To modify your exchange settings, Tap Settings > Mail > Contacts > Calendars, select your Exchange account, and tap Account Info.

If you have any questions or experience any difficulty setting up your phone, please let us know.

Backing up open files with Onguard

Posted on

The Onguard Remote Backup software client can backup open files, and to do this utilizes Window’s Volume Shadow Copy Service, or VSS for short.

In most cases, VSS is able to take a snapshot of open files, which the Onguard Remote Backup client then uses to perform the scheduled backup. Some specific programs, such as the Exchange Server and SQL Server, provide special VSS Writers specifically for backing up their data files. These Writers allow VSS to include the associated data files into the snapshot, whether they are open or not.

Please note that some programs lock their open files in such a way that VSS is unable to snapshot the files. A major culprit for this type of program is QuickBooks, which locks down open .QB* files so that VSS cannot snapshot them.

In the case of programs and files such as these, the way to ensure that these files get backed up is to educate your end user that certain programs need to be closed at the end of the day so that their backup can run properly.

One other situation that may lead to open files not being backed up is if the files are on a network drive, be it a NAS or on another workstation. VSS is unable to perform snapshots on networked drives, so the Onguard Remote Backup software must access the networked files directly to back them up; if a networked file is in an open state that prevents other programs from accessing them, then the backup of that file will fail.

It is recommended that active files, especially those with VSS Writers, be backed up locally and not over a network drive. This will help ensure that these files are backed up properly, and will be usable when restoring data to a system.

Backing Up Microsoft SQL Server with Onguard Backup

Posted on

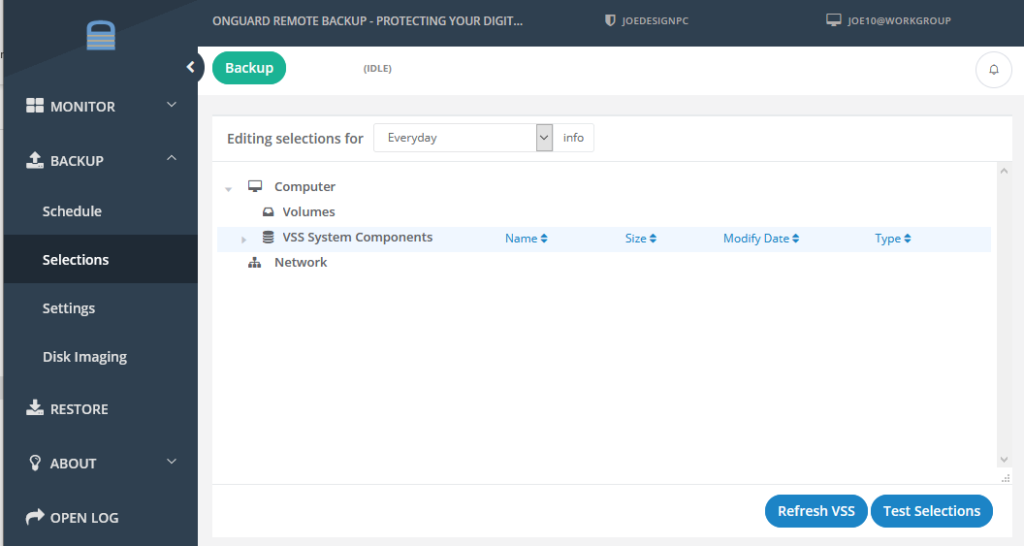
Open the client, and then on the Backup->Selections tab expand Computer and then “VSS System Components” and select the “SQL Server Writer” in the right hand pane.

If you double click on “SQL Server Writer” in the right pane you’ll see precisely which databases will be selected to backup. If you only wish to back up selected databases from this list, you can manually select them. Or if you wish to exclude certain databases, make sure they have a red “X” beside them.